All posts by david

Sleep button for the SteelSeries APEX M500 keyboard

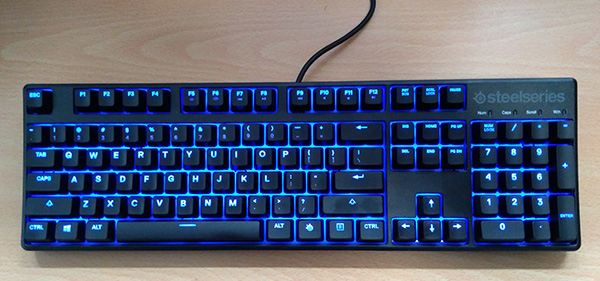
After nearly 15 years I retired my old Cherry keyboard and bought a new SteelSeries APEX MX500 keyboard with Cherry MX Red switches.

APEX MX500
APEX MX500

My old Cherry keyboard had a nice sleep button, wich I used all the time. The SteelSeries keyboard has a very minimalistic design and has no sleep button.

I decided to resort to an autohotkey hotkey to suspend the machine. I did not want to see the console executing the script so I made a VB executable that runs invisible. It is a Windows Forms application that hides the form on Load and executes Application.SetSuspendState. Just very simple.

Private Sub Form1_Load(sender As Object, e As EventArgs) Handles MyBase.Load
   Me.Visible = False
   Application.SetSuspendState(PowerState.Hibernate, False, True)
   Me.Close()
End Sub

I compiled a version for hibernate and another for sleep.

The autohotkey script is reacting to the Pause button for sleep and Alt+Pause for hibernate

; Run qsleep.exe on Pause key
Pause::
   Run, c:\util\davitools\qsleep.exe
Return

; Run qhibernate.exe on Alt+Pause key
!Pause::
   Run, c:\util\davitools\qhibernate.exe
Return

So now I can hit the Pause button to send the computer to sleep just like in the old days with my Cherry keyboard.

I made a zip with both QSleep.exe and QHibernate.exe, and the source code so you can inspect and build the tools yourself. I also included the autohotkey script.

Download QSleep.7z

DaviTools Video Wall

Sony Vegas has all the tools to create a video wall effect, but it is not an easy job and it will take a lot of time to create a complex video wall.

videowallsample1

The DaviTools extension provides you with a graphical representation of your design and lets you edit your design with ease and precision. And the best news is: The extension is a 100% free!

Features

• Visual creation of your Video Wall
• Resize, reposition, rotate, etc. the individual Video Wall channels
• Add Borders
• Live update of changes on the preview window
• Save and Load your projects
• Quickly build Video Walls with presets

Get the plugin for free!

This plugin is completely free of charge and will save you a lot of time. If you can afford it please support this project by donating.


Download Installer for Sony Vegas 8 or 9

Download files for manual install for Vegas 10 and higher

Download files for Sony and Magix versions

Updates september 2014

1. Versions

The plugin is still used in the newest versions of Vegas Pro. I have read forum posts stating that it is working at least until version 12. My guess is that it will also work in version 13, but you have to try.

2. Borders

Are you missing borders? This is a known problem, the workaround is simple. First define a new preset border in Vegas, after this the plugin should also display borders.

3. Installation notes for version 1.1.1

The latest version (1.1.1) of the installer is for both Sony Vegas Pro 8 and 9. You can choose to install for version 8 or 9 during installation.

If you need the Video Wall plugin for a later version of Sony Vegas you have to manually install the files. Download the archive, extract the files and copy DaviTools VideoWall.png and DaviTools VideoWall.dll to the Vegas plugin folder. For Vegas 10 and 11 this is:

<user profile directory>\Application Data\Sony\Vegas Pro\<version>\Application Extensions

This location might be different for newer versions of Vegas.

Update september 2020

VideoWall for Magix versions of Vegas Pro

The VideoWall has been recompiled by HappyOtterScripts to work for Magix versions of Vegas Pro, starting from version 14.

Download and unzip the file  and copy the desired  extension (dll) file and icon into the appropriate folder.

For Magix versions: “C:\ProgramData\VEGAS Pro\Application Extensions”.

For Sony versions: “C:\ProgramData\Sony\Vegas Pro\Application Extensions”.

Documentation For DaviTools VideoWall

Installation

Download the VideoWall extension and execute the downloaded file. The installer will start and install the plug-in. When installation has finished start Vegas. Navigate to the Extensions menu option in the View menu. Click the DaviTools VideoWall option. The plug-in will open in the Dockable area as the first tab page (when you restart Vegas the extension will be placed in alphabetical order with other extensions you may have installed).

You are now set to start using the VideoWall extension.

VideoWall Basics

The VideoWall extension will let you add a so called channel for every video track or track event in your project. A VideoWall channel is connected to a video track by track number and event number. The first channel you add will be connected to the first video track, the second to the second track and so on. You can add more channels than there are events in your project but the channels will not be connected to any event. When you add more video events you can connect the channels manually by changing the track number and trackeventnumber properties.

videowall screenshot1

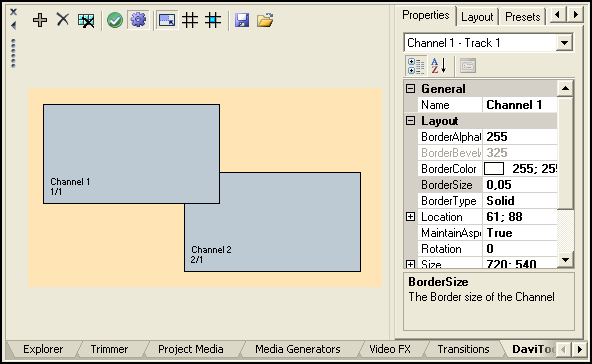
Above you see a screenshot of a VideoWall with two channels added. On the left side of the VideoWall window you see the VideoWall screen, here you add channels and move them around. At the top there is a button bar with several buttons that will let you add and remove channels, among other things. On the right side you see several tab pages, here you can change properties of the added channels, set the initial layout of channels and more.

Quick Start

Start off by adding some video tracks to your project. Now open the VideoWall window and click on the “plus” sign. A new channel is added and if you have a preview window open you can see the effect immediately. Add as many channels as you need. You can set the initial properties of a new channel on the Layout tab page. When you are done adding channels you can begin to layout your videowall. Click a channel to activate it and drag it to a new position on the screen. If you need more precision you can also move the channel by using the arrow keys. To move a channel to a specific position you can change its location in the property grid on the Properties tab page.

The Buttonbar

AddChannel Add a new channel to the videowall (Keyboard: Add key on the numeric keypad).
RemoveChannel Remove the selected channel from the videowall (Keyboard: Delete key).
ClearVideoWall Remove all the channels from the videowall. Also clears the applied videowall settings
from the video events.
ApplyVideoWall Apply the videowall to the connected video events.
LiveUpdate Live Update the videowall. When switched on, everytime you make a change to the
videowall layout it will be applied to the connected channels automatically. When
switched off you have to apply the changes yourself.
KeepAspectRatio Keep aspect ratio. When switched on the channel will keep its current aspect ratio
when you resize it.
ShowGridlines Show Gridlines.
SnapToGrid Snap to Grid. You can set the grid size at the settings tabpage.
SaveVideoWall Save VideoWall. Saves your current videowall to file.
LoadVideoWall Load a previously saved videowall.


Channel Properties

Each channel in your videowall has properties which define things like Size, Location, Rotation and so on. We will now discuss these properties in detail.

Name A name you can use to describe the channel
TrackNumber The Vegas tracknumber to which the channel applies
TrackEventNumber The Vegas trackevent number to which the channel applies
Location X and Y coordinates of the channel
Size Width and Height of the channel
Rotation Rotation angle of the channel (in degrees)
MaintainAspectRation Determines whether the channel will strech the picture when the aspect ratio of
the channel differs from the projects aspect ratio
BorderType The type of Border of the channel
BorderSize Size of the Border
BorderColor Color of the Border
BorderBevelAngle The angle of the bevel of a beveled border
BorderAlphaChannel Alpha channel transparency of a solid border


Initial Layout

On this tab page you can set the initial properties of a new channel. These include the new channel’s dimensions and location and its initial border settings.

Preset Video Walls

With presets you can quickly build some basic videowall configurations. Each preset has its own set of settings with which you can fine-tune the layout of the videowall. When you apply a preset, your current VideoWall will be cleared. Presets include:

Rows and Columns Build a VideoWall whith a variable amount of rows and columns.
Full Width Rows This will build a videowall of full width rows that are distributed evenly.
Full Height Columns This will build a videowall of full heidht columns that are distributed evenly.
Picture in Picture A Picture in Picture effect in one of the four corners.
Large Picture in Picture A centered Picture in Picture effect that fill most of the screen.
Dallas A “Dallas Intro” effect with three columns. The two outer columns are rotated
inwards to create the cone shaped column in the middle.


Settings

On the Settings tab page you can modify several user settings. The settings will be saved and restored every session. You can load the default settings or revert to your last saved settings. Available settings are:

Grid horizontal en vertical spacing Sets the horizontal an vertical spacing of the grid.
Grid color Sets the color of the grid lines.
Background color Sets the background color of the VideoWall work area
New channel color Sets the color of newly added channels
Create channel for each Event When you check this option, each time you add a channel, it is connected to the
next available Video Event. When you uncheck this option newly added channels
are connected to the next available Video Track.
Clear unused events When you check this option, each time you apply the VideoWall all of the Events
on the timeline that are not included (i.e. not connected to a channel) will be
“cleared”. Clearing applies to the Pan/Crop settings on the first frame and any
Sony Border settings.
Confirm building preset VideoWall Check this option to get a confirmation dialog before a preset VideoWall is
applied.
Show channel info Check this option to have the channel’s name and Track/Event connection
displayed on the channel.


Release Notes

1.0.0
First version of the VideoWall extension, this version was specific to Vegas 8.0b, users of prior versions of Vegas 8 were not able to use the extension.

1.1.0
Corrected the problem with versions prior to Vegas 8.0b The extension should now work for all Vegas 8 versions. No other changes.

1.1.1
Adapted the installer to give a choice for installation on Vegas Pro 8 or Vegas Pro 9.

September 13, 2020
Recompiled for Magix versions starting from version 14.

Citrine Chess Table

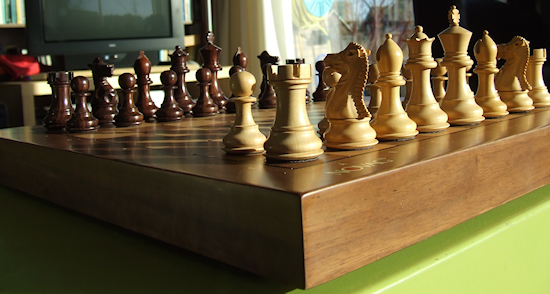
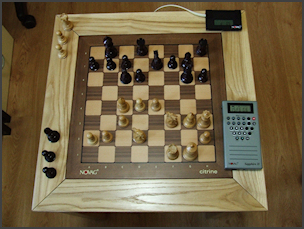
The Novag Citrine is a handsome table top chess computer with a wooden auto sensory board. It is nice enough to have it somewhere in your living room on a table, but I thought it would be even nicer to have it built into a chess table.

Here is a picture of my Citrine before it was turned into a table:
citrine1

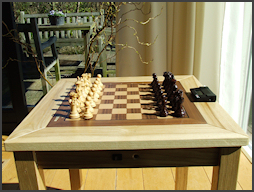
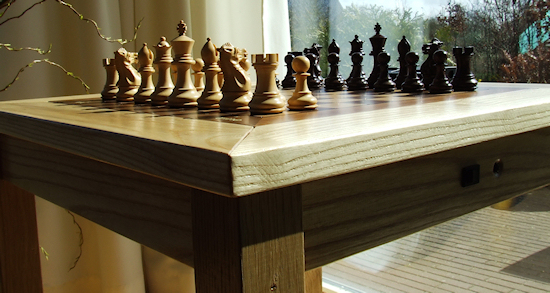
And here you see the Citrine turned into a table:
citrine2

I chose a light oak wood for my table because it is not too expensive and is easy to work with. The light color of the table makes for a nice contrast with the dark parts of the Citrine.

I had the miter cuts of the frame done at a wood store. I told them to make sure the inner width to be 37 cm. This turned out to be to tight a fit for the Citrine. I had to sand the four sides a little bit to make the Citrine fit.

Because I wanted the on/off button and menu button on the side of the table, I had to do some wiring inside the Citrine. I am sure this will void the warranty.

Also I wanted to get rid of the adaptor, so I did a home made battery back using 6 large 1.5v batteries.

Building the table

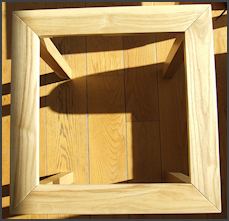
The legs of the table are 45 mm thick and 600 mm long bars. They are joined together with 22 mm thick planks. The joints are reinforced with dowels.

I attached the planks about 10 mm inwards to get a nice classic look.

The dowels you see on top of the planks are later used to hold the table top frame in place.

I first made the two benches separately and then joined them together with the remaining two planks.

design1

The table top frame consists of four planks of 22 mm with a 45 degree miter cut.The inner width of the frame should be 370 mm or a little bit less.

When the frame is in place you can use your sanding machine to precisely fit the Citrine.

You could join the planks together with dowels and glue, but I just attached each plank to the base of the table separately.

design2


To allow for some space for the Citrine’s buttons and connectors, I cut out a part of one of the frame planks. The Citrine is fitted into the frame from the bottom up and there should be enough space to plug in the wires.

citrine4

Here you see the finished table from the front and from the top:
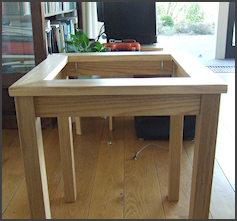
citrine3citrine5


Next is rewiring the Citrine to get the buttons on the side of the table working. I’ll explain about the battery back and show how I fixed the Citrine into the frame.

Rewiring the Citrine

The Citrine has a panel on the right side with connectors and switches.

When the Citrine is fitted into the table that panel will no longer be easy reachable. I wanted the on-off button and the menu button to be relocated to the outside of the table.

The first thing I planned was connecting wires to the existing buttons.
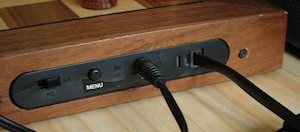
switch_panel

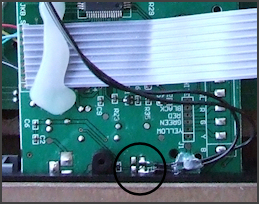
This didn’t work out for the on-off button since that turned out to be a  so called on-on switch. When you switch the button on, another connection is switched off.

switch_schematics

That is why I had to remove the on-off switch from the print. If someone has a solution where you can leave the switch in place please let me know!

The menu switch is a simple momentary switch, so no problem here. I attached two wired to the print and lead them to the new switch on the table.

I hope these pictures are clear enough to show what I did:
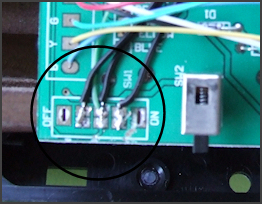
wiring_onoff_switch

wiring_menu_switch


With the wiring done I made a small hole in the hardboard cover to lead the wires through, and closed up.

Battery Pack

Another thing I wanted to do is to get rid of the adaptor. I think a classic chess table with a black wire comming out of the side is not very nice. The ideal solution would be to make a recharcheable battery pack, and have the Citrine charge overnight so at daytime I could use the table without wires. When the batteries would run out I wanted to be able to switch to the adaptor. But I didn’t end up doing that. Mainly because I don’t know how to do it. So I settled for a removable battery back that I could load with either rechargeable or normal batteries.

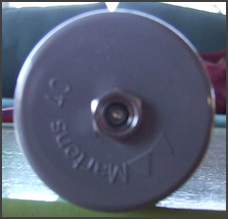
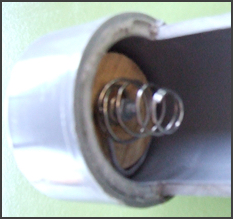
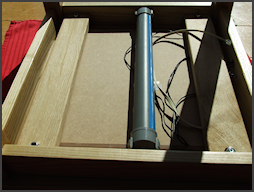
The battery pack is made of a 400 mm PVC sewer pipe. Remarkably, the large round1.5v D (or LR20) batteries exactly fit into this pipe. I cut out spaces to easier fit the batteries. At both ends I glued on end caps, and attached a spring to one end and a 5.5/2.1 mm female connector to the other end. A wire runs on the outer side of the pipe from the spring to the connector.
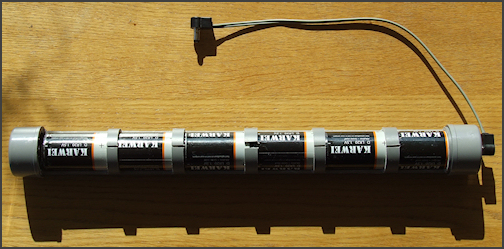
batterypack1

batterypack2batterypack3

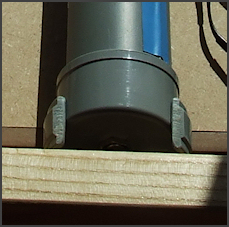
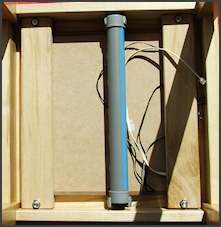
I used two plastic clamps that are normally used to fit the sewer pipe to a wall. Cut off the “feet” of the clamps and attached them to the bottom of the table. Now the battery pack can be easily removed to refill with new batteries.
batterypack4batterypack5

The only thing left is assembling the table. On the next page I’ll show how I fitted the Citrine into the table, connected it and played my first game on it.

Assembling

The Citrine is fitted into the top of the table from the bottom up. I made two planks and attached them to the bottom to secure the Citrine. The planks are attached to the bottom using 4 KOMBI wood screws. They have a bolt wire on one side and a wood screw wire on the other side. You screw them in using a Torx screwdriver. Because of the hardness of oak wood it is advisable to predrill the wood. To fix the screws I dipped them in a bit of construction glue before screwing in. This hopefully will also prevent the screws from rusting.

The planks are U-shaped and the legs of the U must be the right height to fit in the Citrine exactly level with the frame. To have a little bit of a margin I used some rubber on the legs to. This gives me about a millimiter of adjustable height. By tightening or loosening the nuts I can raise or lower the Citrine somewhat.

citrine7

In the right side of the table I made two holes to fit the on-off switch and the menu button. I am not very happy with the menu button and I am planning on replacing it with a nicer looking one.

citrine8

One problem to solve is the LCD display of the Citrine. At first I wanted to build the display into the table somehow. But later on I decided not to do that to keep the table as natural as possible. So I settled for a solution where I use the display when I need it simply lying on the table. The Citrine comes with a ridiculously short cable to connect the LCD display, so I had to make a longer cable. To do this you need two RJ11 plugs and a flat cable with 6 wires. The cable is a crossover or reversed configuration. If you do not have the special tool used to attach the connectors you can push in the little copper connector knives one by one using a small electrical screwdriver (as I did).
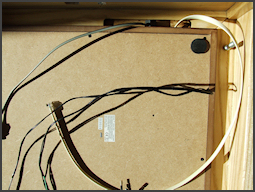
Next I connected the power cable and the display cable, turned the table upside down and lowered the Citrine into the frame. I screwed on the U shaped planks and connected the wires to the on-off switch and the menu button. Finally I clicked the battery pack into the clamps and connected the power cable to it.
citrine9

citrine10

citrine11

citrine12

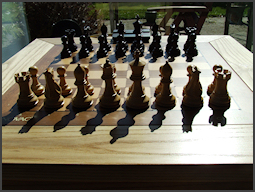
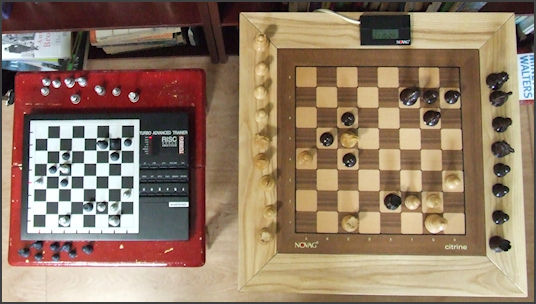
To finish this story about the Citrine table I included the first games with the table. The first game is at level at4, which is 15 seconds a move. This game I won. To not spoil the first day as a table for the Citrine, I played another game at level tr7, which is 40 moves in 2 hours. I think that game is a draw. The third game is a game I let the Citrine play against my older Novag Sapphire II. Both the computers are set at level tr3 (40 moves in 30 minutes. This was not finished, but would clearly be won by the Sapphire. And finally a game between the Citrine and my Saitek Turbo Advanced Trainer. Both set at 30 seconds a move. This game was won by the Citrine!

I hope you liked these pages. If you have a question or did a similar or other interesting project with the Citrine I would be happy to hear about it. You can reach me at feedback(at)davitools.com.
citrine13

Citrine Table vs Novag Sapphire II


citrine14

Citrine Table vs Turbo Advanced Trainer


Actuarial Calculator

actcalc

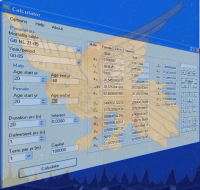
The Actuarial Calculator is a tool that gives you a direct view on several actuarial values with just a few clicks.

It is delivered standard with several mortality tables; some taken from the Human Mortality Database.

You can simply add mortality tables as long as you use the same format as the mortality tables that are delivered with the tool. See below for a descriptions of this format.

You need the .NET Framework 2.0 or higher to run ActCalc.

If you have a question or comment regarding ActCalc please write to: jay-mus(at)hotmail(dot)com

Download the Calculator

Documentation

By default the mortality tables are in a subdirectory of the executable. When you want to change this, change the path in the options dialog.

The calculator calculates actuarial variables with the button “Calculate”. They will be based on the mortality table and the year or period.

You can add any table you want in the form of a textfile. Tables are tab delimited and must include the following columns:
Year Age qx qy pmx lmx pmy lmy
Use Ctrl+K to copy any value with focus to the calculator on the right of the screen for simple calculatory operations.

Mail2PGN

mail2pgn_logo

When you receive PGN format chess games in your mailbox you might want to collect those games in a separate pgn file.

Instead of copying the individual games to a text file you can now use Mail2PGN to scan your inbox for PGN games and write them to file.

Mail2PGN can read plain text inbox files like for example Mozilla Thunderbird uses and Outlook folders. If you need another mail format write me at feedback (at) davitools.com and I will try to add the requested format.

Download Mail2PGN

Documentation

You need the .NET Framework 2.0 or higher to run Mail2PGN.
usage:

mail2pgn [-s source | -f outlookfolder[\outlookfolder]] -d destination

source Path to mail text file

outlookfolder Outlook folder path (ommit for Inbox)

destination Path to destination PGN file

If you are using Mozilla Thunderbird as you email client you need to specify the location of the mbox text file. This file is easily found by look at the properties of your email account.

Select the account in Thunderbird and click “View settings for this account”. On the “Server Settings” tab page look for the “Local directory” textbox. Copy the folder containing your inbox file and add “\inbox”.

If you are using Outlook, Mail2PGN will know how to find your default Inbox. If the games are in a subfolder you need to specify the folder using the “-f” switch. You can specify more subfolders by separating the folder names with a backslash.

Mail2PGN is tested with Mozilla Thunderbird, Microsoft Outlook 2003 and 2007.
Please note that when you use Mail2PGN with Micosoft Outlook you might get a warning message from Outlook that a program is trying to access your addresses. This warning is part of the Outlook Object Model Guard and is fired because Mail2PGN “reads” your message to find the PGN. You have to allow this for Mail2PGN to function properly.

Examples

The following command line will write games found in a mbox mail file called “inbox” and copy them to “d:\chess games\mail.pgn”:
mail2pgn -t TEXT -s inbox -d “d:\chess games\mail.pgn”
The following command line will write games found in the default Outlook Inbox and copy them to “d:\chess games\mail.pgn”:
mail2pgn -t OUTLOOK -d “d:\chess games\mail.pgn”
The following command line will write games found in the subfolder “chessgames\won” of the Outlook Inbox and copy them to “d:\chess games\mail.pgn”:
mail2pgn -t OUTLOOK -f chessgames\won -d “d:\chess games\mail.pgn”

Switch Off Manager

swoffmgr_logo

Switch Off Manager is a command line utility that will shutdown or standby a computer based on logged on or connected users.

In situations where you want a computer to be available to multiple remote users but don’t want them to be bothered with shutting down the computer when they are finished using it, you can use Switch Off Manager to periodically check the system for connected or logged on users. When no one is using the computer, it will be shutdown or put in standby mode.

By running the utility in the Windows task scheduler you can have the utility check your systems at a specified interval.

You need the .NET Framework 2.0 or higher to run SwitchOffManager.

Download SwitchOffManager

Documentation

Usage:
swoffmgr [\\computer] [-l] [-s|-d|-e command [-a]] [-i domain\user[,...]]

\\computer Act on specified computer

-l Consider only logged on users

-s Suspend the computer

-d Shutdown the computer

-e Execute the specified command on the specified computer

-a Execute action ignoring logged on or connected users

-i Ignore the specified user(s)

Suspending is done by executing “rundll32.exe powrprof.dll,SetSuspendState” at the inspected computer. As you might know this will result in hibernating if the option “Enable hibernation” is checked in your Windows power options. To have the computer suspend you have two options:
•you can disable hibernation on the target computer
•you can use a custom tool on the target computer to suspend it
The latter is done by using the -e switch and specify your prefered utility. I can recomend PsShutdown from SysInternals.

To run the utility at a certain interval in the Windows task scheduler you have to set the Advanced options of the task:

Specify no End Date, Check Repeat task, specify the interval and set the duration to be 23 hours and 59 minutes. This will run the task every interval repeating indefinitely.

If you are using Windows Firewall, you have to allow “Remote Scheduled Tasks Management” to unblock SwoffMgr.

If you want to contact me about Switch Off Manager please write me at: feedback at davitools.com.

Front-end for PsTools

fepstools_logo_2Front-end for PsTools (FePsTools) is a graphical interface around the command line tools from SysInternal’s PsTools.

FePsTools gives you an easy way to build the command you need to execute a PsTool utility. While you are clicking and typing the needed options you can see the command line build up.

Once you have created the command line, FePsTool can execute the command for you and will show you the results. It can also create a shortcut from your command line or you can copy the command line and use it in your script.

This is version 2 of FePsTools. With this new version the program is brought up to date with the version 2.44 of PsTools.

Besides a make-over of the user interface there are several other new features. Please refer to the documentation to read about the new features and fixes.

Download FePsTools 2.0

Documentation

Below you see the main window of the program.

1. Click on one of the toolbuttons to display to options for the selected PsTool

2. Here you choose the switches/options that should apply to the tool

3. The command line is built while you select options and switches

4. With the Execute command you run the selected tool. Press the Cancel button to stop a running tool. Press the shortcut button to create a shortcut from the command line. Press the help button to display the help output from the selected tool.

screenshot1

Shortcuts

The following keys are available to quickly execute some of the available actions:

F8 Execute the tool
F9 Cancel execution of the tool
Shift + F1 Show the help output of the selected tool
Ctrl + F1 Show the PsTools help page of the selected tool


 Settings

settings

PsTools Directory
Here you fill in the path to you PsTools utilities.

Hide Password in command line
If you enable this option the password will be hidden in the command line. When you copy the command line or create a shortcut the password will be visible in plain text.

Open last used tab on startup
When this option is checked the program will remember the last selected PsTool and reopen it on startup.

Output Window Color
You can choose to have the output shown in a black window with white characters or in a grey window with black characters.

Computer List

computerlist


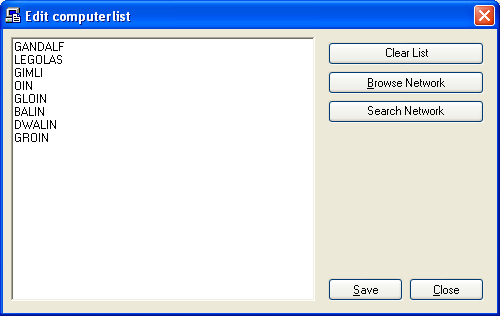
Most of the tools take a textfile with computer names as input. On the Edit computer list window you can edit your computer list. The list is a plain text file and each computer should be on a separate line.

With the Browse Network button you can browse for a specific computer to add to the list.

The Search Network button will search the network for computers and populate the list with the found computer names.

Release Notes

Version 1.0
First version release in june 2004

Version 2.0
Made up to date with the PsTools version 2.44
Quoted long names with space
Fixed several command line bugs
Password can be hidden in command line
Made Window resizable
Several GUI updates
Search network for computers and populate computer list
Added shortcuts for most common actions
Added option to show tool help output
Added option to show pstools help pages